Sunday, August 2, 2015

Persian delights

In March 2011, I first made khoresht-e gheimeh then in November 2013 I discovered khoresht-e ghormeh sabzi.  I revisited both of them this winter and went on to make khoresht-e mast with chicken and maygoo polow with prawns and herbs.  Most satisfying, I mastered chelow, the classic Persian rice dish and this is now my go-to rice dish.  I am also working my way through the variations.  If you want to know more about Persian cooking borrow the book, Saraban, from the library.  If you just want to make a delicious meal let me tell you how.  I always make these dishes for six because they freeze well and then there is always something delicious in the freezer during the film festival when there may not be time to cook after a movie.
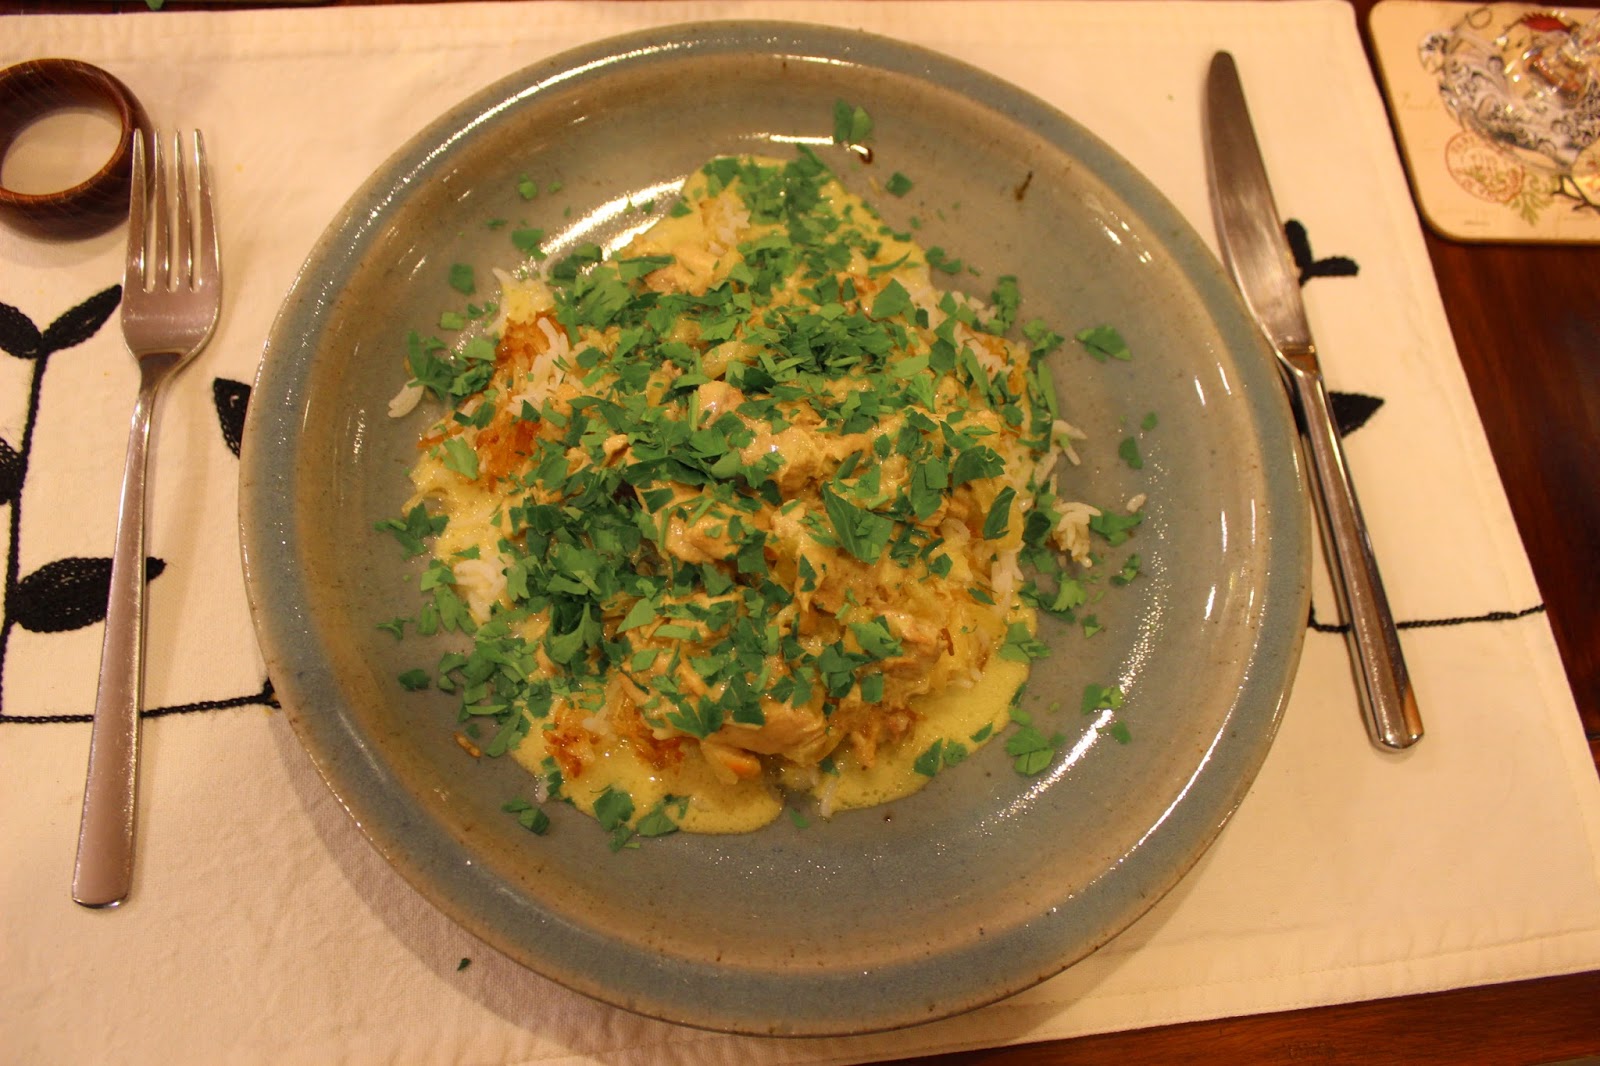
The chicken khoresht is great if you don't have two or three hours to cook the lamb version.  This will only take an hour once you've sweated the onions.  To start, sweat 2 finely chopped onions with 2 finely sliced celery sticks until soft.  Stir through 1 tsp ground cumin, 1/2 tsp  ground ginger, 1/2 tsp ground cardamom, 1/4 tsp cayenne, 1/2 tsp ground black pepper and cook for a few more minutes.  Cut 1 kg of boned chicken thighs into 2 or 3 pieces each.  Add them to the pan and brown briefly over a high-ish heat making sure they are all coated with the spicy onion mix.  Add a bay leaf, 500 ml chicken stock, a few saffron threads, zest and juice of a lime and juice of an orange.  Season with salt and simmer for an hour or so.  While the stew is cooking whisk 350g of Greek yoghurt with an egg.  When the stew is ready, whisk a few tablespoons of the hot broth into the yoghurt and egg mix then pour it all into the stew.  Add 1 tbsp slivered pistachios and cook at a bare simmer for five minutes to thicken.  Stir in one direction only and be sure not to let it boil or it will curdle at this stage.  Now Greg Malouf adds golden raisins but I do not.  It brings back memories of terrible 70s curries and I can't quite do it.  Apricots and prunes, yes but raisins, no.
Now as I mentioned above I feel I have mastered the Persian chelow and I am not sure what I was afraid of.  You need to allow about 80 minutes but most of that time it is looking after itself so it's no effort.  The recipe is for 6 so I just do 1/3 when making for two.
Wash 300g basmati rice and leave to soak in a generous quantity of warm water for 30 mins (30 minutes doing nothing with rice).  Strain the rice and rinse it again with warm water.  Follow these steps and you will be rewarded with perfectly separating grains.  Now boil a large saucepan of water, salt generously and stir in drained rice.  Boil at a rolling boil, uncovered for 5 minutes. I bring the water to the boil while the rice is soaking to save time and I turn it off if necessary so it only takes a minute or two to reboil when needed. Strain and rinse again and drain off as much of the water as you can.  Now is the tricky bit but it's not really tricky at all.  Melt about 40g of unsalted butter with 2 tbsp warm water and set aside.  Heat 1/4 cup oil with 1 tbsp water on a medium high heat in a large saucepan - the one you used to boil the rice.  When the oil begins to sizzle spoon in enough rice to cover the base of the pan in a thin layer - this is going to form a crust.  Spoon in the rest of the rice gradually building it up to a pyramid.  Don't tip it all in because you want it loosely piled to achieve the fluffy separateness.  Use the handle of a wooden spoon to poke a few holes down through the rice to the base of the pan.  This is to help it steam.  Now drizzle the melted butter over the rice.  Wrap the saucepan lid in a tea towel and tightly cover the pan.  Leave it on the medium high heat for a few minutes until you see some steam trying to escape then turn right down and leave for 40 minutes.  Another 40 minutes doing nothing with rice.  Don't peek.  It won't hurt if you leave it for up to an extra 20 minutes.
When you are ready to serve plunge the pan into a few inches of cold water in the sink.  The sudden change in temperature cause the rice to shrink from the sides of the pan loosening the delicious crunchy bottom.  Now invert the pan into a serving dish and it may plop out as one glorious mound with a beautiful golden crust.  Or it may not.  In which case just scoop the crust, known as the tah-deeg, over the top. Once you have mastered this you can do all sorts of variations to the crust with yoghurt, potatoes or bread.
And you can make an complete dish of the rice such as maygoo polow with the addition of herbs and prawns. Wash soak and parboil the rice.  Soak 1 tsp fenugreek seeds for 10 minutes, then gently fry in a frying pan with a small finely chopped onion, 1 tsp ground black pepper, 1 tsp turmeric, 1/2 tsp ground ginger.  Add a chopped deseeded tomato and 200g peeled prawns with tails on.  Don't worry if they're not.  Stir briefly until the prawns just begin to colour.  Remove the pan from the heat and stir through 1/3 cup finely snipped chives, 1/3 cup shredded flat leaf parsley, 1/3 cup shredded dill sprigs.  You can also add coriander if you must.  Now start to prepare your parboiled, drained rice for steaming.  Heat the oil and put the layer of rice in the bottom for the pan.  Scatter a layer of the prawn mix and layer up your pyramid with rice and the prawn mix ending with a layer of rice.  Poke the holes, drizzle over the butter, wrap up the saucepan lid and go off and do something else for 40 minutes.  Don't peek.  When done tip out as described above. 
You can serve all Persian meals with a herb salad and flat bread.  I sometimes serve stews with wilted spinach seasoned with nutmeg.
If you would like to carry the Persian theme through to coffee whisk some mascarpone with a little honey and lemon zest.  Slit some medjool dates to remove the stone, but don't cut in half.  Pipe the mascarpone mix into the dates and sprinkle with pistachios and rose petals.

Sunday, July 26, 2015

La Pasta in Casa

I thought it would be nice to make pasta and I bought 00 flour.  Some considerable time later I thought, "Must get on to that pasta making" and I bought a pasta machine.  More time passed and I thought, "Must get that pasta machine out of the box".  So at last the flour and machine were introduced.  It transpired that some years had passed between the initial thought and the action.  The flour was no longer viable and the pasta was not a success.  Undeterred I bought another bag of flour and this time it all came together.
Making pasta really is quite simple.  Just make sure your flour is fresh!  I consulted Marcella Hazan, her son, Giuliano and the New York Times.   This is what worked for me.  Start with 1 egg per 100g flour.  You need at least two eggs to get a quantity you can work with and you can dry it and store in an airtight container so there is no issue with having more than you need.  Before you begin, clear your work surface because you will need plenty of room once you start rolling.  Pour the flour into a mound on the work surface.  Note that marble is too cold and won't work.  Make a well in the centre of the flour and break the eggs one at a time into the well.  Beat the eggs gently with a fork until the yolks and whites are mixed together - actually this proved a bit hard and I resorted to whisking the eggs first before pouring into the well.  With the fork, gradually incorporate the flour into the egg until the egg is no longer runny.  Work from the inside wall of the well.  If the egg escapes onto the bench it is not easy to recapture.  Once you've reached the stage where you have quite a viscous mixture, quickly bring the remaining flour over the egg mixture and scoop it up, mixing with your hands until you have a moist but not sticky dough.  Wrap the lump of dough in cling film to stop it drying out at all and clean the work surface and your hands ready for kneading.  Knead the dough until it is very smooth and silky - this only takes a couple of minutes if all is well. Rewrap in cling film and rest for at least 20 minutes.
Set up your machine for rolling and get out lots of tea towels to lay out the rolled dough.   Cut a three-egg dough into six portions and keep the ones you are not working with wrapped in cling film.  Flatten the chunk of dough in your fingers and start to feed the dough through the machine starting at the widest setting.  Feed each portion through this setting three or four times, folding into three after each roll.  Then, reducing the rollers by one notch each time roll all the pieces through the machine and lay them out on dry tea towels.  Leave to dry a little so that it feels a bit leathery but not brittle.  Maybe 10-20 mins.
When they are ready, shape your pasta.  We made fettuccine according to the instructions on the machine.  To store the ribbons, wrap them loosely around your hands to form nests then leave to dry on a tea towel before storing in an airtight container.  They will keep for months.
To cook drop the pasta in a large saucepan of well salted boiling water and boil with the lid off for a few minutes until al dente; 2-3 mins will be enough on the day of making. 
I rediscovered the classic tomato sauce for pasta.  Put two tins of tomatoes in a saucepan with a halved onion and 100g butter.  Simmer over a low heat about 40 minutes until the tomatoes have reduced and slightly separated from the butter.  Discard the onion and either use the sauce immediately, set aside to reheat later or freeze. This sauce is indescribably good.   It will keep for a few days in the fridge. Serve this on any kind of pasta including filled shapes, which is our next project.  I served the first batch with cauliflower florets that I had lightly steamed then roasted in olive oil with a sprinkling of chilli flakes.  Just top with the sauce and some grated parmesan.
We used the reserved fettuccine with chicken and mushrooms with tarragon, which is a dish well worth trying.  We have made this two or three times and it is nice with any of the suggested accompaniments.
We  made some pappardelle by loosely rolling the sheets and cutting by hand about two centimetres wide.  We served this with my go to Bolognese recipe.  This sauce with pappardelle is one of my favourite pasta dishes and the home made pasta just made it better.
This experiment has been worth the effort and we will be keeping it up. Next we will be trying stuffed pasta.  If you have any suggestions about making pasta at home please share.  All ideas welcome.

Sunday, July 12, 2015

Chicken dinner

We don't eat chicken as often as we used to.  Not even to make stock because we can buy frames at Moore Wilson.  Recently we needed to replenish the stock and I recalled a wonderful chicken recipe with orzo and leeks, which I discovered last year.  This is such a simple way to serve a roast chicken meal with minimum effort and put at least one more meal on the table during the week, as well as replenish your stock stores. 
Sit a chicken in a roasting pan, breast side up.  Pour over the juice of a lemon, rubbing some into the skin, then stuff the lemon skins into the cavity along with some sprigs of thyme and rosemary, and tarragon if you have it.  Ours has died back for the winter. 
Drizzle the chicken with olive oil and dot with a little butter.  Chop some more of the herbs and sprinkle over, then season with sea salt and black pepper.  Add about 2cm of water to the pan and lots of unpeeled garlic cloves.  A dozen would be good.  Roast at 200 for 70 minutes or until done. 
Transfer the chicken and garlic to a plate, cover with foil and keep warm while you prepare the accompaniments. Add about 1/4 cup white wine to the pan juices, bring to the boil on the stove top and reduce to a pouring cream consistency. 
Meanwhile, and I would start this just before taking out the chicken, boil a saucepan of water for the orzo and sauté in a little olive oil a finely sliced leek in a heavy bottomed frying pan.  Cook the leeks until they are soft and sweet then add 2-3 bunches of finely sliced spinach.  Cook the orzo (or risoni or any rice shaped pasta) according to the instructions on the packet and mix with the leek mixture.  Pile the orzo mixture onto a serving plate and top with the chicken and garlic then drizzle over the reduced winey pan juices.  This will become your go to chicken recipe. 
Next day make stock.  The left over orzo makes a good weekend lunch  - just heat and add any other left over greens you have in the fridge.  You could add some cooked puy lentils if there is not so much orzo and more of you.
During the week you could use up the left over chicken in a pasta dish.  Make a tomato sauce by gently frying chopped garlic in a little olive oil then add a crumbled dried chilli, 2 tsp dried oregano and 3 tins of tomatoes.  Simmer for an hour then add a tbsp. red wine vinegar and stir well to make sure all the tomatoes are broken down.  You can use what you need now and freeze the rest in batches for later.  Once you've set aside some to freeze add the shredded left over chicken and maybe some blanched broccoli or whatever green vegetable you have to hand.  Serve with penne or fusilli pasta topped with grated parmesan. Or your home made tagliatelle.  But that is another story.